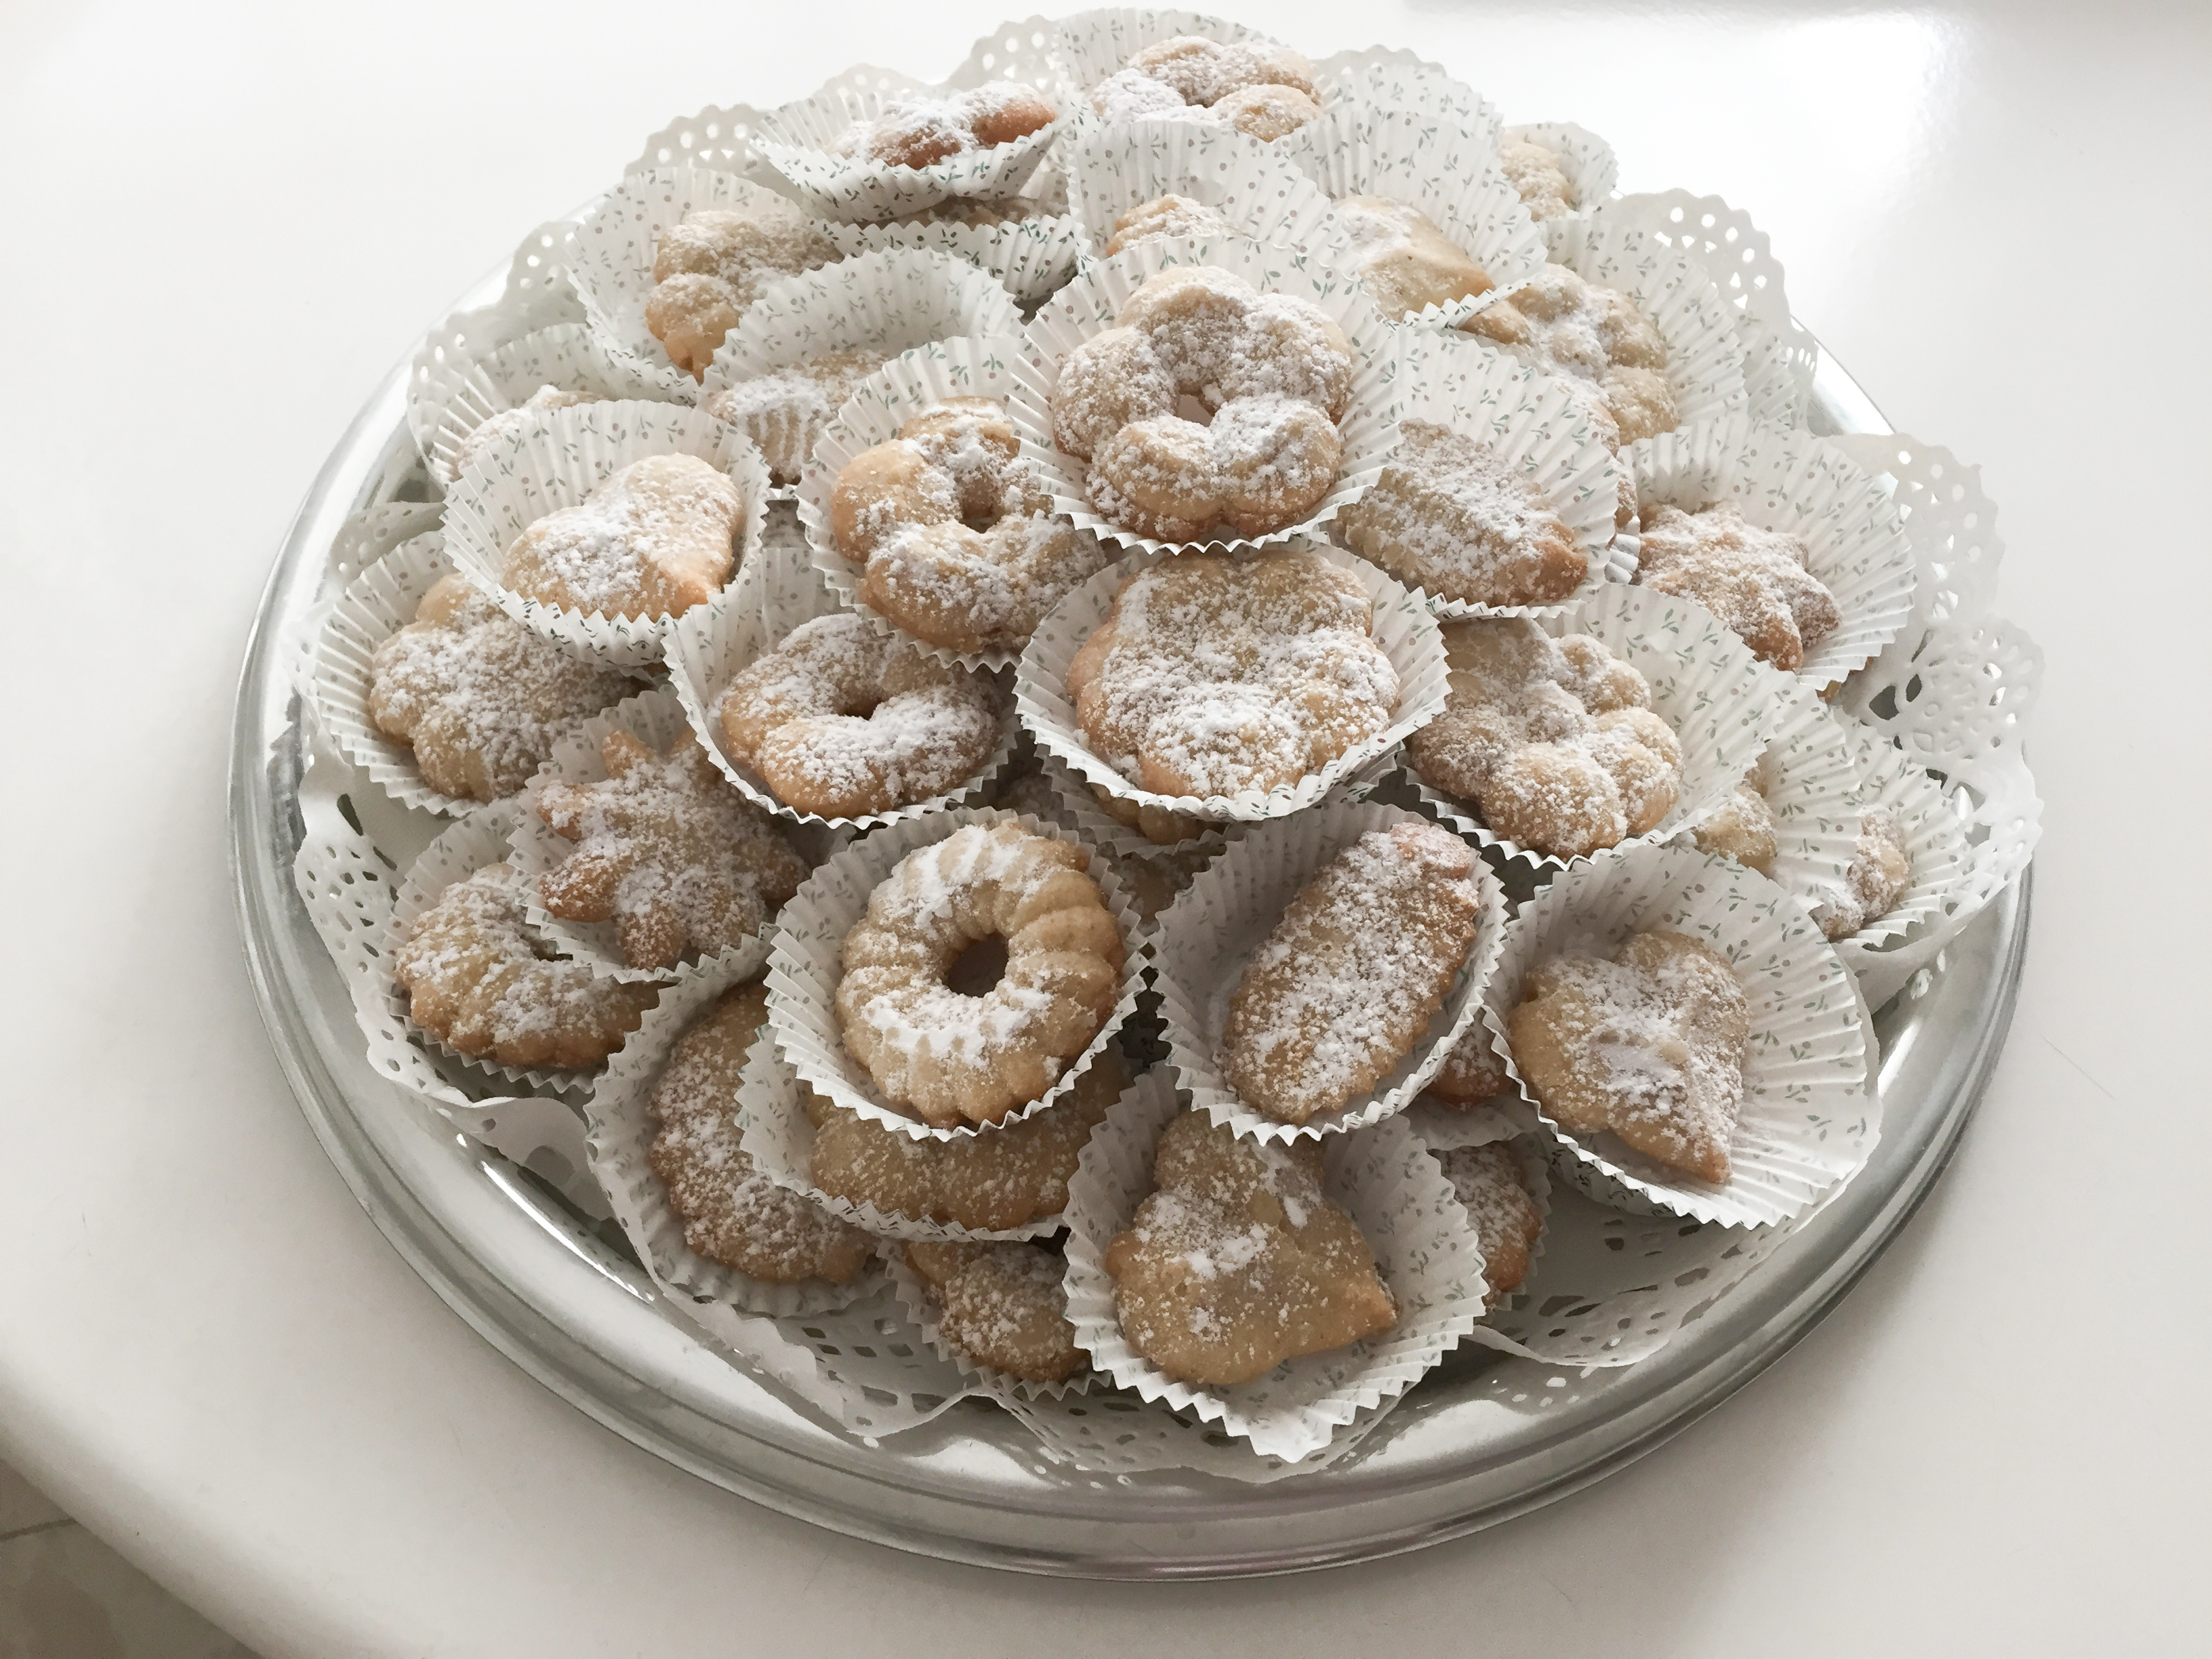
These cookies are a favorite in our family.
I have been making them since 1975; I was at home one evening waiting for a friend to come over. In those days there were no cellphones, and here in Jerusalem not everyone had a telephone at home. My friend wasn’t able to let me know that she is going to be quite late – I was getting impatient, and decided to use to time to browse through a little cookbook that I had. I saw the recipe for Russian Teacakes, and since I had all the necessary ingredients at home, decided to make them. Not only were they an instant hit, but they also reminded me so much of my mother’s “famous” nut crescents.
Through the years, I have been asked to bring these cookies to parties, gatherings of friends and family. They have been termed my “classic cookies”.
The cookies are easy to make, but must be baked very carefully, and it is of utmost importance not to overbake them – the color must be a light golden brown around the edges – and not a bit darker! And once cooled, they must be put in a hermetically closed box.
Tip: When I am making these for “home consumption”, I often take a shortcut, and pat the dough into a rectangular pyrrex which is lined with parchment paper (baking paper) – and then cut the dough with a sharp knife into diamond shapes or little squares, as soon as it comes out of the oven. Do not remove from pan until they have cooled. Sprinkle with powdered sugar, as written in the instructions.
Ingredients:
- 1 cup (half a pound, or 220 grams) butter cut into little cubes
- 1 teaspoon vanilla extract
- 1/2 cup powdered sugar
- 2 1/4 cups regular white flour
- 1/4 teaspoon salt
- 3/4 cup very finely ground walnuts (recommended to grind them in food processor, till they are oily and almost like a spread)

Preparation:
- Preheat oven to 375F or 180 C
- In food processor, combine butter, vanilla and powdered sugar.
- Pour in flour, salt and well-ground nuts; turn on Food Processor and process until the ingredients form a smooth dough; once the dough is formed, and leaves the sides of the food processor, STOP MIXING.
- Form into cookies, either by using a cookie press, or by forming little balls or half-moon shapes. Place cookies on parchment paper (baking paper) which is placed on a cookie sheet. I usually form the cookies and put them in the refrigerator for half an hour to harden before putting in the oven. If you are using a cookie press, do not press directly onto the baking paper – you can transfer them to the baking paper after they harden in the refrigerator. If you are doing the cookie shapes (balls or half-moon), you can put them directly on the baking paper before putting in refrigerator..
- Place in pre-heated oven, with another EMPTY cookie sheet underneath the cookie sheet with the cookies. The purpose of this is to absorb some of the heat of the oven, so that the cookies will not burn on the bottom. THIS IS AN IMPORTANT STEP – DO NOT OMIT.
- Bake about 10-12 minutes, watching the cookies carefully so that they don’t get overbaked; they should be a nice golden color around the sides of the cookies, and on the bottom. DO NOT OVERBAKE.
- Remove from oven, and immediately sprinkle with powdered sugar, via a sieve so that it will be evenly spread over the cookies.
Allow to cool. - Place in a hermetically closed box after the cookies have completely cooled
- Just before serving, sprinkle additional powdered sugar on the cookies (but not TOO much).
DO NOT LEAVE COOKIES UNCOVERED…… – KEEP IN CLOSED BOX.
They keep well for over a week, if stored in closed box.

Leave a comment